Whole Wheat Foccacia

Photobucket

I just replaced the sugar and flour used in this recipe with honey and whole wheat flour and voila !

Water ~ 250ml
Olive Oil ~ 2 TBLS
Salt ~ 1 tsp
Honey ~ 2 tsps
Whole Wheat Flour ~ 3 cups
Yeast ~ 2 tsps

Add ingredients to bread maker in order listed and use the 'dough' setting.

Press dough into a lightly greased pan. I used baking paper.

Cover and stand in warm area for 30 min or til doubled in size. (I always fill the sink with hot water and stand my doughs on top of that to make it warm ... works well)

Remove cover, brush with olive oil and sprinkle with rock salt.

Bake in pre-heated oven 200C (400F) for 30 (mine only took 20 minutes) minutes or until golden brown.

Pumpkin Lentil Salad - UnP Version

Photobucket

So ... I've posted this recipe before ... but last night I made it with a couple small modifications to suit our Unprocessed Year requirements ... It was just as good. If not better ...

1 kg pumpkin ... I like kent or butternut but any that is good for roasting would be fine.
1/3 cup fresh squeezed orange juice - I used my citrus juicer & small oranges ... took 30 seconds !
1/4 cup olive oil
2 tsp honey
2 tsp Moroccan seasoning
1/2 a red onion
2 cloves garlic, crushed
1 can lentils
spinach and rocket mixture
feta

So .... spray your pumpkin with olive oil and roast in bite size pieces in a 200C oven - 20 minutes or so.

Make dressing by combining orange juice and 1/2 the olive oil, honey and Moroccan seasoning.

Heat remaining oil in a frying pan over med heat. Cook onion and garlic for a couple of minutes ~ until soft. Add lentils ... heat through.

In serving bowl, combine lentil mixture, pumpkin, greens, and feta. Top with dressing.


Photobucket

I served this with whole wheat foccacia (recipe coming tomorrow), olive oil and dukkah for dipping.

Shepherd's Pie


500g beef mince (ground beef)
1 onion - finely diced
garlic - to taste
1 can cream of mushroom soup
green beans - frozen or canned.
4 cups mashed potatoes
cheese - to top

Preheat oven to 180c/350f.

Put potatoes on to boil.

Brown the mince with the onion and garlic. Season to taste with salt and pepper. Add soup. Pour mixture into a casserole dish. I like a big round one but any will do.

Add a layer of green beans.

If you haven't already drained and mashed your potatoes, you should do that now ... if they are ready. If they aren't then wait ... raw potatoes don't mash well. Or taste good. I add a bit of milk and a scoop of butter ... but just make your mash like you would normally. Add to casserole, on top of green beans.


Top with cheese. Bake. Uncovered. 20 ? 30 ? minutes ... til bubbly !


YUM YUM YUM !!!

NOW ... I need some advice. I checked the cream of mushroom soup can and while there are no icky preservatives, I'm just not sure how a can of condensed soup that lives on a shelf for years and years could be good for us. SO ... I want to try and substitute something else in it's place. I'm wondering if I could do a white sauce ... maybe with some sauteed mushrooms in it ?

What do you all think ? Any other ideas ?

Also ... has anyone ever frozen white sauce ? How'd it taste when thawed and then used ?

Breaking News ...

Photobucket

We interrupt our regularly scheduled recipe postings to give you this exciting news ...

Bonnie finally has a proper camera !!

Don't get me wrong, my point and shoots have served me well over the years ...

but this ... this Nikon D-90 is so stinkin' cool !!

My husband gave it to me today

~ an early birthday present ~

and I love it !

I can't wait til I actually know how to work it !!

I'm working on it !

Gordon and {the} TOC


I'm not a fan of Gordon Ramsay ... but I saw this video and thought it was pretty funny. Mostly because I tried to chop my thumb off, while cutting spring onions, just the other night ! Don't worry ... he's very tame in this video ... even seems like a nice guy. Not an impression I've ever gotten from his show ...


In other news ... if you direct your eye to the top left hand corner ... just under the header photo, you will see some new links ! The one that I'm most excited about is the Table of Contents !

Why don't you click and see what happens ...

Spicy Potato Pizza


This was a little experiment ... I liked it ok the first night ... I liked it lots as leftovers !

I used my whole wheat pizza dough ... and then the recipe for spicy potatoes ...

All I did was thinly slice a potato or two ... just enough to cover the top of the pizza. In a bowl, I mixed a bit of olive oil and the spices:

1/4 tsp ground turmeric
1/4 tsp chilli powder
1/4 tsp salt

Add the potatoes. Let them sit while you roll out your dough ... then add your potatoes to the top of the dough. I drizzled all the olive oil and spice mixture onto the top ... there wasn't a heap left ... you really just want them coated ... Put your pizza into the oven. 200c/400f ... for about 15 - 20 minutes.

While that's cooking ...

2 tbls oil
1 or 2 tsp black mustard seeds ( I never measure these, just pour 'em in ... )
3. 4, 5 (??) garlic cloves, crushed
1 tbls sesame seeds

Get your smallest frying pan and heat the oil. Add the mustard seeds. I use a combination of black and yellow seeds. Fry the mustard seeds a couple minutes ~ til they splutter. Add the garlic. Fry for a couple of minutes. I like the garlic to begin to turn brown. Then add the sesame seeds. Fry for a couple of minutes ~ til they begin to turn brown. Remove from heat.

When the pizza comes out of the oven, top with the mustard seed mixture !!

**

We think this needs something ... maybe a sauce for the base. Don't think tomato will be good, that's why I didn't use anything. Any ideas ?? A cream base ? A pesto base ? Help us out here ... this could be an AMAZING pizza if we could just find that 'something' it needs !!


Grilled Vegetable Moussaka ~ With Meat


Rory and Jono were watching a cooking show the other day, saw Moussaka being made and promptly requested that I add it to the menu ... I'm glad they did because this is a delicious discovery !! I found the recipe here but of course, made a couple of changes ...

Ingredients:

3 large eggplant, thin round slices
3 large potatoes, thinly sliced
3 large zucchini, thinly sliced lenthwise
extra-virgin olive oil - for grilled veg
5 tablespoons butter
7 tablespoons whole wheat flour
5 cups milk
1 pinch ground nutmeg
salt to taste
1 egg yolk, beaten
1 tablespoon olive oil
1 kg beef mince (ground beef)
1 onion, chopped
1/4 cup chopped fresh oregano
1/2 cup chopped fresh parsley
large can of diced tomatoes
1 cup crumbled feta cheese


Directions:

Fire up your BBQ. Brush eggplant, potatoes, and zucchini lightly with extra-virgin olive oil. Grill until just tender and golden brown.

Layer potatoes into the bottom of a 9x13 inch glass baking dish. Next layer in the eggplant, followed by the zucchini; set aside.

Preheat oven to 190c/375f. Melt butter in a large saucepan over medium heat. Gradually add the flour, cook until the flour smells slightly toasted, about 5 minutes. Gradually add in milk, about a cup at a time ... if you haven't worked it out, you're making a white sauce here ! Add nutmeg and salt. Bring to a bare simmer over medium-high heat, then reduce heat to medium-low and simmer 10 minutes.

Place the egg yolk into a bowl, and quickly whisk in 1/4 cup of the white sauce, Quickly stir the egg yolk mixture into the white sauce, mix until smooth, then set aside.

Meanwhile, heat 1 tablespoon of olive oil in a large skillet over medium-high heat. Brown beef and onion. Stir in the oregano, parsley, tomatoes, salt, and pepper. Turn heat to medium-low, cover, and simmer for 10 minutes, stirring occasionally.

To assemble, spread the meat mixture over the vegetables, and sprinkle with the feta cheese. Pour the white sauce over the top. Bake moussaka in preheated oven until bubbly and golden brown, about 30 minutes.

Bonnie Made The Ajiaco Soup !


And you all need to make it too !
This soup is so delicious !

I made it just like Andrea said ... with only a couple of changes.

I didn't use onion flakes, but rather, finely diced 1/2 an onion and sauteed with garlic.
I'm pretty sure I used a teesy bit more garlic than called for ...
And instead of adding the instant mashed potatoes
that, just for the record, contain about every
preservative in the book (!!), I used
a couple spoonfuls of whole
wheat flour ... it worked
just as well !!
YUM !

I can't wait til lunch ... leftovers !

Slow Cooker Brownies


(would you like some brownie with that cream ??)

I got this recipe here ... I made a couple of changes that I will post here ...

You need to find a dish (I used an oval pyrex dish) that will fit into your slow cooker. DO THIS NOW !

Prep time: 20 minutes
Set time: overnight ~ so start these the day BEFORE you want to eat them !
Cooking Time: 6 – 8 hours

1 15-oz can black beans, drained and rinsed
2 extra ripe bananas ~ I just thawed a couple out of my freezer
3 Tb apple sauce ~ I peeled and chopped a couple apples, added a tablespoon or so of water, microwaved a couple minutes, pureed in stick blender and INSTANT apple sauce ! I fed the leftovers to the kids with dinner !!
4 Tb honey
1/2 cup unsweetened cocoa
1/4 tsp ground chili
1/2 tsp cinnamon
1 tsp vanilla extract
1/2 cup rolled oats
1/2 cup walnuts, chopped

The night before: Process the rolled oats in a food processor ~ til they are sort of like a flour. Put in a big bowl and add walnuts. Add all the other ingredients to the food processor and process until smooth. Add this mixture to the oats and mix thoroughly.

Line dish that you've already decided you'd use with baking paper paper and pour your brownie mix in. Cover and put then in the fridge until morning

In the morning: Get some aluminium foil and roll it into a ring to place under the dish in the slow cooker. Then put the baking dish on top of the foil ring. Cook on low for 6-8 hours.

These have a very 'dark chocolate' feel to them, hence the big blob of whipped cream we put on top !!

Menu Plan Monday - Bonnie - 22 March 2010

I liked having a two week menu planned. So much so that I'm going to do it again.

I like it for two reasons.

One ... I only had to shop once in two weeks ... with a few small trips in for milk, etc ... I can handle that !

Two ... I only spent just over one week's budget on two week's food ! I can TOTALLY handle that !!!

Photobucket
Menu Plan Monday is hosted by Laura at I'm an Organizing Junkie


Friday 19th
Pizza


Saturday 2oth
Spanikopita Meatballs
Roasted Cauliflower

Sunday 21st
We're going to try Andrea's Ajiaco Soup for the first time ! I'm excited !!


Monday 22nd
I'm going to make an old favorite ... Chicken Chimichangas
But ... I'm going to use homemade whole wheat tortillas out of my freezer
and I'll have to substitute diced tomatoes and diced green chilis for the salsa

Tuesday 23rd
Going to friend's place for dinner.

Wednesday 24th
Spinach and Pumpkin Dahl

Thursday 25th
Spanish Tortilla and Salad

Friday 26th
Pizza

Photobucket

Saturday 27th
Rory's Salmon on BBQ

Sunday 28th
Ecuadorian Quinoa Vegetable Soup

Monday 29th
Potato and Leek Soup
and I'm going to try making these whole wheat dinner rolls

Photobucket

Tuesday 30th
Pumpkin Lentil Salad
With foccacia ... only I'm going to try it with whole wheat and whole wheat spelt flours.

Photobucket

Wednesday 31st
Going to try Aunt Jo's stuffed peppers again, but with cous cous this time !

Thursday 1st of April
didn't plan anything ... will have leftovers or go out or eat in or have eggs or something !!!
GOTTA HAVE ONE DAY OUT OF 14 BE UNPLANNED !!!


How to Make {Cheese}

In this case, the cheese in question is Paneer. This is an Indian cheese that's pretty simple and easy to make, and is suitable for a vegetarian (although not vegan, 'cause let's face it...it's cheese) diet. The cheese itself is fairly tasteless (so don't throw in your lasagna), but when added to curries and things like saag paneer or fried in butter with a little garlic, it sings!

The original website I used seems to not exist anymore, so if this doesn't work, it's only because my memory is bad! Also, I may add in some pictures later, but I don't have time just presently.

What you will need:
4 cups of whole cow's milk
3-4 Tablespoons lemon juice (you can also use lime juice or leftover whey from your last batch)
Cheesecloth
Thermometer
A sieve
A saucepan

Heat the milk to 80 Celsius, or just before the boiling point. Add in the acid, 1 teaspoon at a time, making sure to give it a good stir. Keep adding the acid until the curds separate from the greenish whey (and while you're stiring, be sure to note that Little Miss Muffit was dumb-tuffit, 'cause would you really eat that??? Even without the impeding visit of a spider??? No, you would not).

Pour the mixture through a sieve lined with a couple layers of cheesecloth (If you want to, you can let the mixture cool for 30 minutes before this step, but I found it easier just to rinse it with lukewarm water until it was cool enough to handle). Rinse with fresh water. Squeeze the water out of the cheese with your hands. Then, sit your cheese under something heavy and let it self-squeeze for a while. The more moisture you remove, the firmer your cheese will be.

Optional: soak your cheese in cold water for 1-3 hours (I threw mine, cheesecloth and all, into a ziplock with some cold water and left it in the car while I grocery shopped. So mine soaked for however long that took, maybe an hour and a half). This will improve the color and texture of your cheese.

Note: this recipe does not yield a whole lot of cheese, so maybe plan to make two or even three batches.

Icy Poles ~ Peach, Nectarine and Apricot


What kid doesn't like Icy Poles ? Popsicles ? Ice Blocks ? Whatever you want to call them ...

My two love 'em.

And I don't mind them having them ... when I make them at home.

These ones were a bit of accidental discovery made in an attempt not to waste food.

I bought a box of seasonal fruit that included peaches, nectarines and apricots.

It's the end of the stone fruit season and they weren't all that great.

Some were not ripe. Some were over ripe.

Not one of the appealed to my eye ... or my appetite.

So ... I just chopped 'em up (skin and all), threw 'em in a pot of water and boiled away.

Then I took that whole pot, poured it (water too) into my blender.

(almost burned myself to death because the blender was too full ... be careful of that !)

Blended 'til smooth.

And then poured into our icy pole molds.

I had heaps of the mixture left over though

so I put a couple inches of the mixture into plastic cups, added half a straw,

covered with press and seal and froze those.

A couple minutes soak in hot water when ready to eat and they slip right out of the cup !


Mexican Chicken Quesadillas


These were so simple.
I just spread a whole (not cut up) whole (not white) wheat flour tortilla with
leftover Crock Pot Mexican Chicken, avocado, rice and mozarella cheese.
Top with another whole whole wheat flour tortilla.
Toast in sandwich press.
DONE !!

Mexican Chicken ~ with Unprocessed Modifications

I discovered and first cooked this recipe over a year ago. I was wanting to cook it again but the salsa doesn't fit with our unprocessed specifications. Lots of preservatives in store bought salsa ! The other night, I decided to experiment with it and it was a huge success !! I neglected to take a photo so am going to repost this old one with both recipes in it ...

All I did the other night was change a few ingredients, the rest is the same.

So ... Instead of the jar of salsa ... I added ...
1 can of diced tomatoes
1 can diced green chilies
and a few dried onion and garlic flakes.

I cooked the chicken for 6 hours. Turned it off for a couple hours. Turned it back on 30 minutes before we wanted to eat to throw in the cream cheese ... but ... see instructions below for all those details ...


Photobucket

I found this amazing recipe over at 'from Mommy's kitchen'.
Made it the other day and we loved it.
Kids loved it.
I loved it.
Rory loved it.
Rory even loved it for lunch the next day !
And I have another full meals worth frozen to eat in the next week or two !!
Love that !
Lots of love involved with this meal !

Here's the recipe ...

4-5 boneless chicken breasts, frozen
1 can black beans (15 ounce)
2 cups corn, fresh or frozen
3 limes, juiced
3 tablespoons fresh cilantro, minced (optional) - I didn't have any fresh so I used dried.
1 jar of medium salsa (16 ounce)
1 package low fat cream cheese (8 ounce)

Place the frozen chicken breasts in the bottom of the slow cooker. Add all of the remaining ingredients except the cream cheese.

Cook on high heat for 5-6 hours , until chicken is fully cooked and falling apart. A half an hour before serving, stir to break up the chicken and add the cream cheese, let melt, mix it in just before serving.

Serve over rice.

PS .. Next time we have it we are going to try serving it in ................ drum roll please ............ yep, you guessed it ........... flour tortillas !!!!!!!!


Frozen Whole Wheat Tortillas ~ The Verdict


The kids tried the frozen tortillas tonight ! I made Mexican Chicken Quesadillas ! I'll post the (very simple) recipe soon !!

But for now ...

I wanted to find out what the kids thought of the tortillas. I didn't want rehearsed (you may think it is rehearsed when you listen to it ... but I PROMISE it isn't !) answers from them, I just told them to answer my questions ... and they did. Jono got all shy (and soft spoken) because I told them it was going on the blog ... and Alia got silly ... because the camera was on !

Sorry the video is sideways ... I totally spaced it until I was already mostly done recording. I thought about doing it again but then the answers would have been rehearsed and I didn't want that ! I hope you can just deal. Turn your head sideways ... or your computer monitor !! :)

Without further ado ... from the mouths of my babes ... the 'verdict' ...


Edited to add ...

On 24 June linked to Food on the Table's "No Whine Wednesday"

Here's the Chicken Quesadilla Recipe.

And the Whole Wheat Flour Tortilla Recipe.

Yogurt Making


I've made a discovery...homemade greek yogurt is AMAZING. Bonnie got a wonderful little yogurt making machine and Aunt Kathy (AKA: AK) got one and was on her way to making our lives full of yummy yogurt! You can get yourself this lovely little toy at: http://www.easiyo.com/

There are yogurt making packets that can be purchased along with your EasiYo, but if you would like to make it from a yogurt start, here are AK's instructions:

Tools:
One tool I find indispensible is a candy thermometer. Other optional tools are a little whisk, a rubber scraper, and a plastic spoon or paddle of some sort for dishing up the done yoghurt (metal serving spoons break down the yoghurt. I use my rice serving paddle from my rice cooker, but largish and plastic are the operative words here.)

Ingredients:
1) A generous 4 cups of milk, any style…….my preference has become ½ cup half and half and then just over 3½ cups whole milk (my reference book said that if you use milk alone, that you should add some powdered milk to the milk….I’ve never tried this, but I will get you the amount needed if you are interested. You can use milk with less % of fat this way……….but I’m all about the fat!) You will understand what I mean about the generous 4 cups of milk after you have made several recipes.


2) Greek yoghurt to use as a start. I prefer Greek as it is much thicker, any type would really be fine, but…..MAKE SURE THE WORDS “CONTAINS LIVE CULTURE” APPEAR ON THE LABEL SOMEWHERE. I like Fage brand the best, however I can’t get that in my regular grocery store, and have recently discovered that Danon (or is it Yoplait?) has started carrying a Greek yoghurt with live cultures in the supermarket and it is quite acceptable, and that saves me a trip to the natural grocery store.

Process:
1) Put ~¼ cup yoghurt on the counter to come to room temp while heating the milk. I put it into a liquid measuring cup so it’s in a good container already for its next step.

2) Slowly heat the milk to ~195°. (I have tried stove top heating (on low at first and then medium heat at the end—hook the thermometer on the side of the pan and watch the temp go up) and microwave heating both, I prefer in the microwave.) To make sure it’s heated slowly in the microwave I heat it for these times 30 sec, 30 sec, 35 sec, 35 sec, 40 sec, 40 sec……..you get the picture…….I check the temp (can’t leave the thermometer in the microwave!) frequently, and just keep doing it twice at each length of time, increasing by 5 seconds, till it’s at the temp I want. The book I referred to while “inventing” my process said to not let it come to a full boil, but just to 195°-200°. This process takes me about 15 minutes in the microwave (the math doesn’t seem like it would, but it always seems to!)…..I can’t remember how long it took on the stove, but it was at least that long……

3) Remove from heat and let cool to 105°-110°. This takes about 30 minutes. I check the temp after 15 minutes, then watch it every 5 minutes after that. Be careful that it doesn’t get any cooler than that.

4) When it is cooled, move the skin to the side of the pan and take about ¾ cup of it and add it to the room temperature start in the cup and stir it till smooth (I use the whisk). Take the skin off and discard (I find a fork the best tool for this), then pour the cup full of start and milk back into the milk and blend it up well. Then pour this into the container and put on the lid.

5) Put 110° water into the thermos part. Use enough so that the warm water will come nearly up to the lid of the container when you put it in (this is more water and much cooler than the directions on the Easi-yo indicate). Put that red inner piece and then the container in the thermos, cap it off, put it somewhere where it won’t get jiggled, leave it for several hours. (I carefully check the water temp after about 10 minutes to make sure it hasn’t cooled down because of the temp of the yoghurt container sometimes being slightly lower). After 3 hours I carefully remove and then open the inner container and tip it a little, it is generally quite a lovely yoghurty consistency by this time. I think it could be chilled at this point, but I fix the water temp back to 110° if necessary and always leave it for another hour or so. Once it is thickened, the time spent in the warm bath is gradually making the yoghurt more tart. I have never left it more than 6 hours. (3-6 hours is what my reference book said was the period of time it could take to “yog”. I’m finding 4 hours what mine is taking lately.) You will find what you like….

6) Chill thoroughly before spooning out. It will thicken slightly more as it chills. (I didn’t read anywhere about chilling before serving, but it seems logical to me so I do it that way. If you ever serve any out while warm, let me know if it keeps its shape or gets watery as I am afraid of!)

7) Eat and enjoy!

8) When you get down toward the bottom, put aside the ¼ cup that will become your next start. I don’t know how many times you can use your own start like that, I often serve every last bite I have made, so find myself grabbing another store bought yoghurt to start the next batch…..I’ve only been successful at reserving my own start like 3 times in a row……..it was certainly good that long!

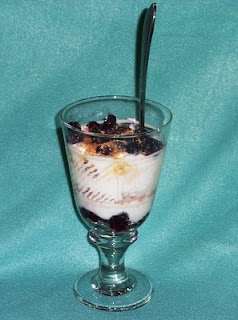
Serve yogurt with any of your favorites!
Examples:
Any berry (frozen or fresh)
Wheat germ
Granola
Agave
Vanilla sugar
Bananas
etc...

The yogurt can also be used to make smoothies or can be made into sour cream or cheese! :-)

Happy Yogurt making AND eating!
Whole Wheat Flour Tortillas ~ Video Tutorial

Over the weekend, I made a huge batch of whole wheat flour tortillas and froze them ! I cannot wait to try them out of the freezer. I have high hopes that they will be WONDERFUL and make my unprocessed life much easier !! Having a supply of tortillas ready and waiting to be used .... bliss !


I did have a few issues with the dough. Turns out I had made a typo in the recipe when I posted it here and had been adding twice as much water as I should have been ! The cool thing though is that this is a very forgiving recipe and I was able to just add more flour ... knead it a bit and still make the tortillas !


(Ready to go into the freezer)

I took this little video while I was making them to show you how simple it is ! It takes a little bit of time to make as many as I made but they should last us a good while before I need to do it again !!


Menu Plan Monday - Bonnie - 8 March 2010

Photobucket
Menu Plan Monday is hosted by Laura at I'm an Organizing Junkie


So ... today is the day. I'm through my first week in my new 'fuller time' position. And now ... I'm getting organized with online shopping. I'm planning a two week menu to get myself on track with the ordering/delivery days of my organic veggies, I've found out that my health food shop delivers (!!) and I'll do my dry goods from Coles still ... Phew. I've had to write down the days I need to plan, the days I need to put in my orders and the days they'll be delivered ! A lot of planning and organization but better than having to do a big shop on a Friday afternoon with kids who would rather be on the playground after a long week at school .... And once I get in the groove, I think it will make the grocery shopping part of my life that much easier !!

Saturday ~ 6 March
Steak on the BBQ (for Rory and the kids)
Mango Prawn Salad for me ...

Sunday ~ 7 March
Homemade Pizza
I'll do a lamb, yellow capsicum, mushroom, feta,
potato and baby spinach one ... possibly with a cream cheese base ....
I'll also do a veggie one.
And a funky lime one.
And possibly a dessert one.

Monday ~ 8 March
Ellie's Black Bean Chilli Soup
I'm going to double the recipe and freeze half.

Tuesday ~ 9 March
Crock Pot Mexican Chicken
(I'm going to substitute a can of tomatoes with some
mexican spices and a few chilis for the salsa that is filled with preservatives ...)
This makes heaps so I'll have leftovers to freeze.

Wednesday ~ 10 March

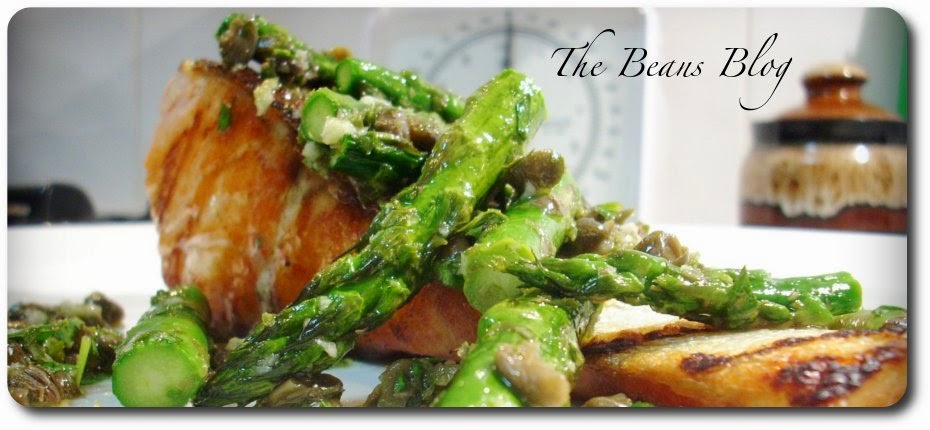
Chargrilled Salmon with Asparagus in a Lime Vinaigrette

Thursday ~ 11 March
Shepherds Pie
(this is an old favorite ... I'll post the recipe after I make it !)

Friday ~ 12 March
Homemade Pizzas again ...

it's cooling off now so we'll probably go back to regular pizza movie nights !

Saturday ~ 13 March

Possibly having people over ... will plan later.

Sunday ~ 14 March

Grilled Eggplant Moussaka

Monday ~ 15 March
Asparagus and Whole Wheat Pasta

Tuesday ~ 16 March
Mexican Cous Cous
(will have to substitute for the salsa again !)

Wednesday ~ 17 March

Eat Something out of the Freezer !!

Thursday ~ 18 March

eggs on toast ... or omelets ... or make something up
my brain is too tired to plan one more meal right now !!!

Additional ...

Lunch Ideas
Leftovers ... of course !!
Cucumber, Cream Cheese Sandwiches

I've never tried making sweets in my slow cooker but this week I'm going to try
Black Bean Slow Cooker Brownies

I'm also going to try making Jill's Granola Bars.


Whole Wheat Flour Tortillas ~ Bread Maker Edition

I'm reposting this because it had an error. These never turned out right after the first time I made them and I couldn't figure out why !! Then a friend tried them and questioned the amount of water, then today I made them today and they were WAY too wet so I went back to the source and for some reason, I had the wrong amount of water. DOUBLE the amount, in fact. So ... I've changed the recipe here to be correct. It is in fact only 1.5 cups of boiling water ... not three !!! I had to add another couple of cups of flour to salvage the ones I made today ... I'm off now to cook them and pop them into the freezer for easy use during the week !!! Sorry if you all have tried these without success. Try them again !!! But ... with the right amount of water !!!

***

I've been wanting to try making flour tortillas for a long time. The thing that always stops me though is making the dough. I'm just not a lover of kneading ! NOT. AT. ALL ! I found this recipe and for some reason that is not obvious to me now, I thought I could do it in the bread maker. I did and it worked so well !! HUGE SUCCESS !! I'm so excited about it !!


I read through a whole bunch of the reviews of this recipe and found a few changes that I thought would be good and therefore almost completely changed the recipe ! Here's the way I did it.

Add the following to your bread maker ...

5 cups whole wheat flour
1 cup olive oil
1 teaspoon salt
1 teaspoon baking powder
1.5 cups boiling water

After you stop wondering if it's going to bubble over, shut the lid, and turn your bread maker on to the 'dough' cycle. I did mine last night before I went to bed. When I woke up this morning, it looked great. I left it for an hour or two or three til I was ready for the next step. When you're ready, roll them into golf ball size balls and put them on a tray. I used a meatloaf pan. When you've rolled them all, cover it. I used press and seal because I was planning to leave them all day and I didn't want them to dry out. And then I left them ... all day, til dinner. One of the reviews said the longer they sit, the easier they are to roll out. So ... when you are ready to cook them ... roll them out, one at a time. (while one is cooking, roll out the next one) I found the ones I had rolled weren't big enough so I combined one and a half balls each time and rolled that out. I just used a rolling pin and I didn't flour the surface because I hate the feeling of flour on my fingers. But ... it was sticky so you might want to if you don't have my same flour foible. Heat your griddle or large frying pan over high heat. I put some olive oil in the bottom of mine. Fry your tortillas one at a time. I'm not exactly sure how long to cook it ... some people talked about bubbles. Some of mine bubbled, some of them didn't. But ... you do both sides. Doesn't take long. I just chopped off a piece of the first couple to see when they tasted done and went from there !!

This recipe says the tortillas can be refrigerated or frozen. I didn't cook them all tonight (there were 27 balls !!) and have refrigerated the leftover balls. Tomorrow, I'll cook up a few more. Freeze a few dough balls. Freeze a few cooked tortillas. You know ... experiment and see what works best !!


I served tonight's tortillas with :
black beans
avocado
tomato
spring onion
greek yogurt
cilantro lime rice

YUMMMMMMMMMMMMMMMMMMMY !

Non {potato} Gnocchi


For the tomato sauce ... I used Amy's recipe but modified it to suit this meal ... by the way, you should try that Fresh Roasted Tomato and Basil w/Pasta recipe ! It's delish too !! Big hit here !

Tomato Sauce:
Preheat your oven to 425F/220C

2 pints grape tomatoes - I just chopped up some romas !
4 cloves garlic, grated
A few drizzles of extra-virgin olive oil
Freshly ground black pepper and salt

Put your tomatoes in a bowl, add garlic, and drizzle with olive oil. Put onto baking sheet. Grind salt and pepper on top. Roast 8 - 10 minutes. When finished, put them in a big bowl and smush 'em up.

Gnocchi
Baby Spinach ... 3 big handfuls, chopped
Ricotta, 200g... (I used the smooth kind because it didn't have preservatives)
1 egg, lightly beaten
1/2 cup whole wheat flour
salt and pepper

Mix all ingredients in a bowl. Make teaspooon size balls. Refrigerate til ready to cook ... at least 30 minutes. Boil water in large pot. Cook gnocchi in batches, til they rise to the top of the water. Shouldn't take more than a minute or two. Drain well.

Serve by putting tomato sauce on bottom of bowl, carefully add gnocchi and top with freshly grated Parmesan cheese.


Menu Plan Monday - Bonnie - 1 March 2010


Photobucket
Menu Plan Monday is hosted by Laura at I'm an Organizing Junkie

i have no menu plan this week ! eeek !
i hate it when i don't have a plan !
but i have not had time to
make one and that is
just plain old
CRAZY !!

lately, i've been planning and shopping on the weekends but i was not home at all this weekend. and i didn't have one minute to think about menu planning. but the crazy busy that kept us away from home all weekend is now finished ... we should be moving into a more mild busy. a busy that's more manageable and less crazy !! i also started my new position at work today and so i'm in that "will i ever have any idea what i'm supposed to be doing?" stage ... plus, it's been raining steadily for-what-seems-like-ever (!!) and i hate grocery shopping in the rain. weird. i know.

i have to get back on track soon though. cooking without a menu for me is high stress. especially when trying to do it unprocessed !! but ... the weather is cooling and that means SOUP, lots and lots of SOUP ! I can't wait.

i'm getting ready to go out and put the potatoes in the crock pot so we'll have Crock Pot Baked Potato Soup (minus the bacon) for dinner tonight. I've got some chicken mince in the freezer so I think tomorrow night will be Spanikopita Meatballs and then I need to have a menu planned for the rest of the week ...

i just heard the kettle finish boiling. i'm off to make myself a cuppa. care to join me ??


Granola Bars

I love granola bars! They are such a quick and easy breakfast or snack on-the-go. But when I went to buy some at the store recently, I started reading labels and was appalled. The only brand that wasn't filled with chemicals, preservatives, hydrogenated fats and high fructose corn syrup was, for one thing, the very most expensive brand, and also tasted terrible.

This cannot be!!! So I decided to make my own. It's actually not that labor-intensive, plus they taste good! And even better, I made nearly 4 times as many granola bars for the same amount of money as the nasty tasting store-bought brand.

GRANOLA BARS
(This recipe was adapted from one by Alton Brown)

2 cups rolled oats
1/2 cup raw sunflower seeds
1 cup chopped almonds
(I bought whole almonds and smashed them with a hammer! Great stress relief!!)
1/2 cup wheat germ
1/2 cup honey
1/4 cup brown sugar, packed
2 T butter
2 t vanilla extract
1/2 t salt
1 1/2 cups chopped dried fruit
(I used cranberries and golden raisins, I think next time I might do a cran-apple of some kind)

Preheat the oven to 350 degrees. Grease a baking dish (for thicker bars, use a 9x9 pan, for thinner, use a 13x9 pan) and set aside. On a cookie sheet, spread the first four ingredients and toast in the oven for 15 minutes. Stir the mixture every so often.

Meanwhile...combine the honey, sugar, butter, vanilla, and salt in a saucepan and cook over medium heat until the sugar completed dissolves.

Reduce the oven heat to 300. Remove the oat mixture from the oven and add it to the sugar mixtures, throw in your dried fruit and stir. (I threw in some chocolate chips, but it immediately melted and disappeared, so I may not do that again. If I get real ambitious, I might drizzle some melted chocolate on top at the end.) Press the mixture into your greased baking dish, making sure to distribute it evenly. Bake for 25 minutes. Allow to cool completely before taking it out of the pan. Cut into squares. (This will yield a different amount depending on what size pan you use. I used a 9x9 pan and got 14 1"x3"x1" squares. AI also wrapped each bar in shrink wrap and stored what I won't eat this week in the freezer. The bars will keep at room temperature for about a week.)